Rigid boxes are a great option for creating luxury with packaging. These boxes are versatile, highly customizable, and are suitable for a wide array of businesses.
In this post, we’re continuing our how it’s made series and showing you how rigid boxes are made. Read on to learn more!
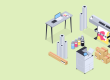
Order Paper and Paper Board
The first step in every packaging production process is making sure that we order the correct materials! Rigid boxes consist of a rigid paper board (also known as greyboard) with paper laid overtop. Paper board is a thicker, more rigid paper material. Unlike corrugation, paper board does not use any corrugation for its rigidity.


One of the features of rigid boxes is that their paper options also include fancy paper! Fancy papers have a variety of unique effects and finishes. This can range from intricate foil designs to imitation fabrics like leather and linen.
Once the paper order is complete, the materials go through the printing process. If the paper is the typical smooth material, then either screen, offset, digital, or relief printing is applicable!
Screen printing uses mesh screens with a blocking stencil to create designs. This is best for simple designs with solid colours.
Offset printing involves a set of rollers that transfer the design using the CMYK colour mode, one colour at a time.
Digital printing also uses the CMYK colour mode, however it differs from offset printing in the spectrum of colours it can print.
Relief printing requires a design to be carved into a block made of wood, metal, rubber, or copper. The designs are transferred by rolling ink onto the stencil, and placing the material overtop.
To learn more about these printing methods, check out our previous post!
However, if you’re using fancy paper for your rigid boxes, traditional printing methods aren’t applicable! Since these materials usually have a texture or unique finish, ink doesn’t adhere to them in the same way as normal paper. Instead, we use embossing or spot UV!
Add-Ons
In this phase of the production process is where we include add-ons such as foil, spot UV, and embossing! Add-ons are a great way to add an extra design element to your packaging to compliment your designs.


Grooving
Grooving is a step in the production process that is unique to rigid boxes. Since these boxes are made of a rigid paper board, they don’t bend easily! To solve this problem, a machine takes the uncut paperboard cuts out the flaps as well as making grooves. These grooves go along the fold lines of the box making it easy to fold later!
This step in important as it also removes any excess material that would make the boxes bulky! Taking this extra measure helps ensure a clean finish once forming is complete.
Gluing
In this phase, we attach the paper and paper board using glue. While the paper board has grooves, the paper itself does not! A worker applies glue using a roller to the paper, which then attaches to the grooved paper board.
The grooves made in the previous step will face inward so the paper on the exterior can provide a more professional, seamless finish. This step is also where any magnets would be added to the box’s structure!
Forming
Finally, the flat paper board is ready to become a proper box! This can either be done using a machine or manually. Especially for manual forming, the pre-made grooves from the previous step help make this part of the rigid box production process easier!
What Can I Use Rigid Boxes For?
Rigid boxes are a great option for a wide variety of businesses! From bakeries, wineries and more, rigid boxes come in a wide variety of structures as well as finishes. The thicker material feels more luxurious than some other box options we have available–plus, they’re great for gifting!
Not sure where to start? From graphic design services to recommendations on what packaging works best for your business, let LeKAC be your one-stop shop for all your packaging needs. Contact us today to find out how we can help!